Where will reading take you?
My friend Miranda is a new 2nd grade teacher this year. She really wanted to do exciting things for her kids and part of that plan, was to make a neat little reading corner for them to "explore" their books. She had had me work on projects for her before, so she knew we could brainstorm and come up with a really creative and fun idea. She sent me a few pictures, and gave me some ideas about the colors and icons in her classroom. Together we decided that a tall post with direction signs leading the kids to places they might read about, was just the right fit. This is my spin on our idea.
It occurred to me, that some of you might be able to use this in classrooms of your own or maybe switch it up a little and create a reading nook for your kids at home. To create this little gem, I had to go out to the wood working shop and enlisted a little help from my husband. Here is how we put it together.
Gather your supplies.
1/2" Plywood. (I used birch).
1/4" plywood
Wood screws
Wood stain
Staining brush
Rags to wipe stain off
Paint
Scrapbook paper
Sand paper
Decoupage glue. I used Modge Podge
Wood glue
You will also need access to a few tools.
Table saw
Ban saw
Miter saw
 Spindle sander
Screw gun
Hand Router
Brad nailing gun
Base and Post
The first thing that you will want to put together is your base and post. Run your plywood through the table saw to cut strips about 4 inches wide and about 5 feet tall.
Run a thin line of glue down the length of the 1/2" edge of one strip. Attach that strip with a brad nailing gun along the edge of the wide side. You will be creating a corner or 90 degree angle with the wood. Continue this process until all the sides are attached. This will look like a long wooden tube when you have it all together.
Run your hand router along the edges of your wooden tube. You're going to be handling this piece pretty often and you don't want splinters slowing you down.
Then, in an open area of the left over plywood, draw out the shape of one of your base legs. You will need four of them as the base attaches to the pole to stand up. I made these base legs about 18 inches long, because I wanted to make sure it would hold the weight of the completed sign and not fall over on any kiddos. When you have one drawn out, cut it out along the pencil lines with the ban saw. Trace around your newly cut out base section three more times to make them match and cut them out with the ban saw as well.
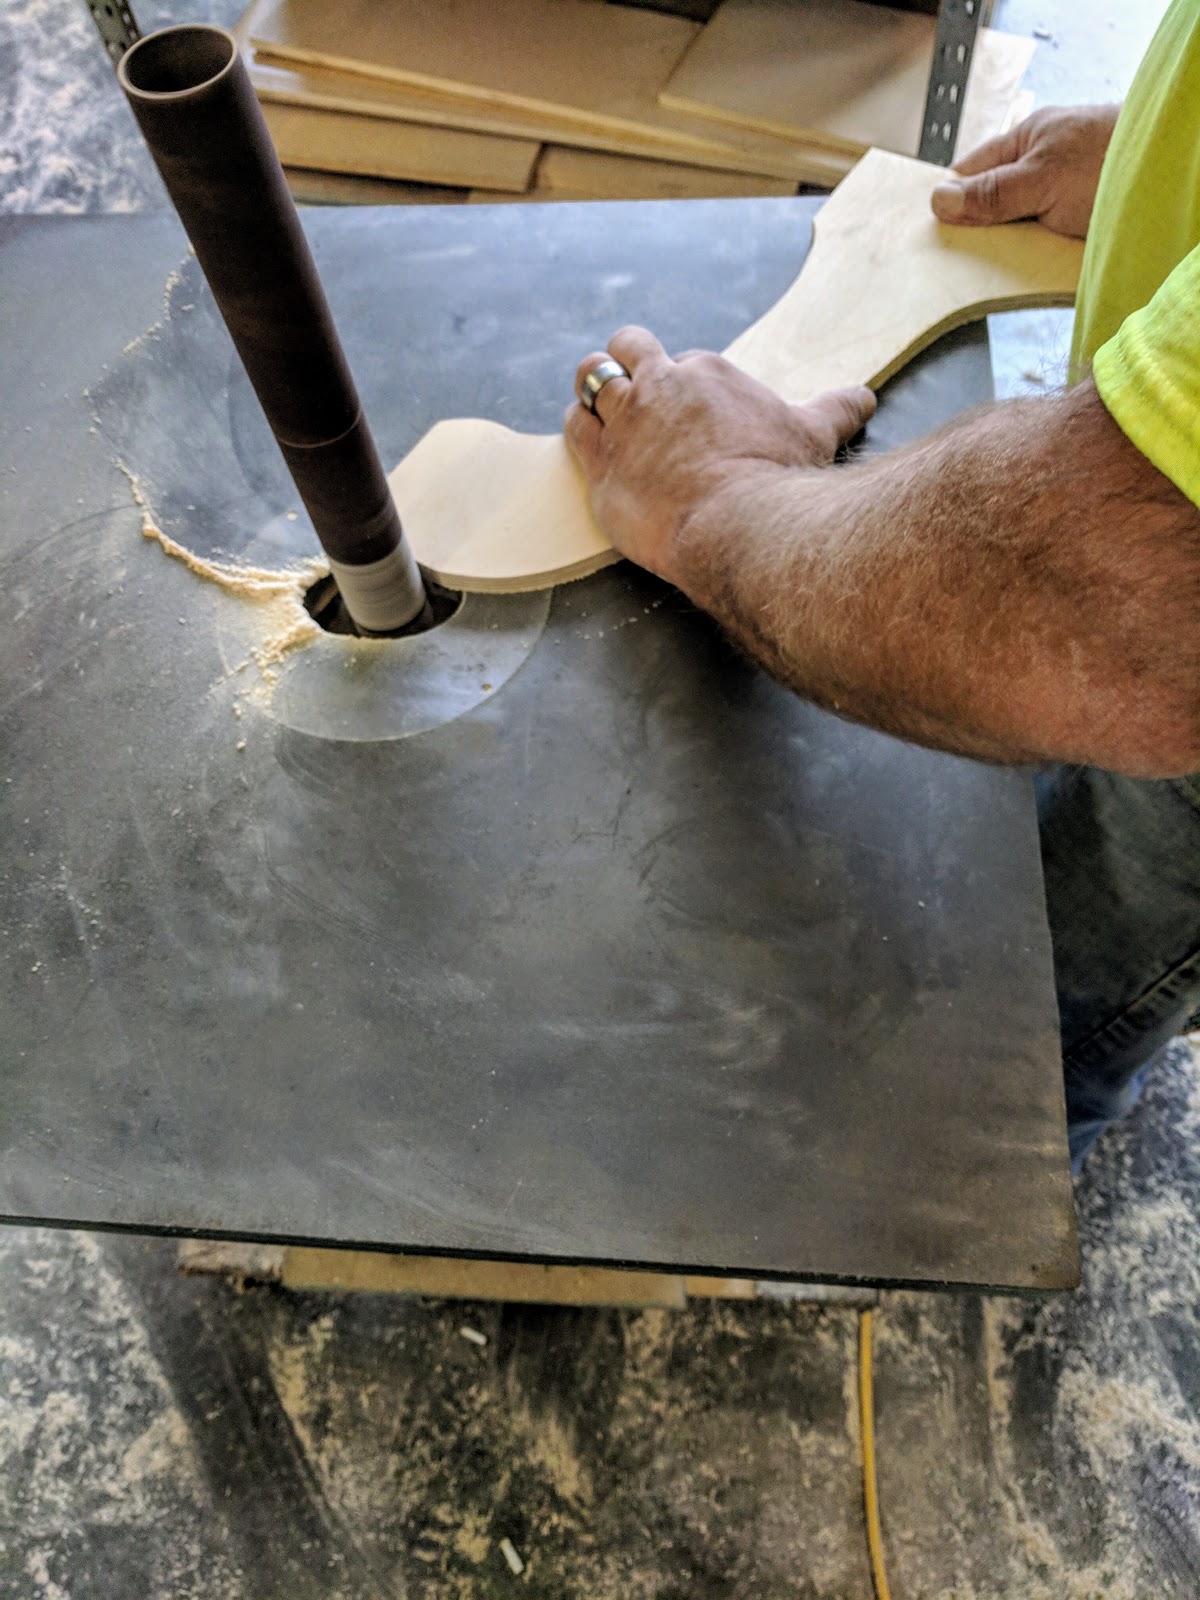
 Using the spindle sander, sand the edges of the legs to smooth out any stutter marks that may have been left from the ban saw. You can then run the hand router along the edge to smooth it out even more. It also makes them look much more finished.
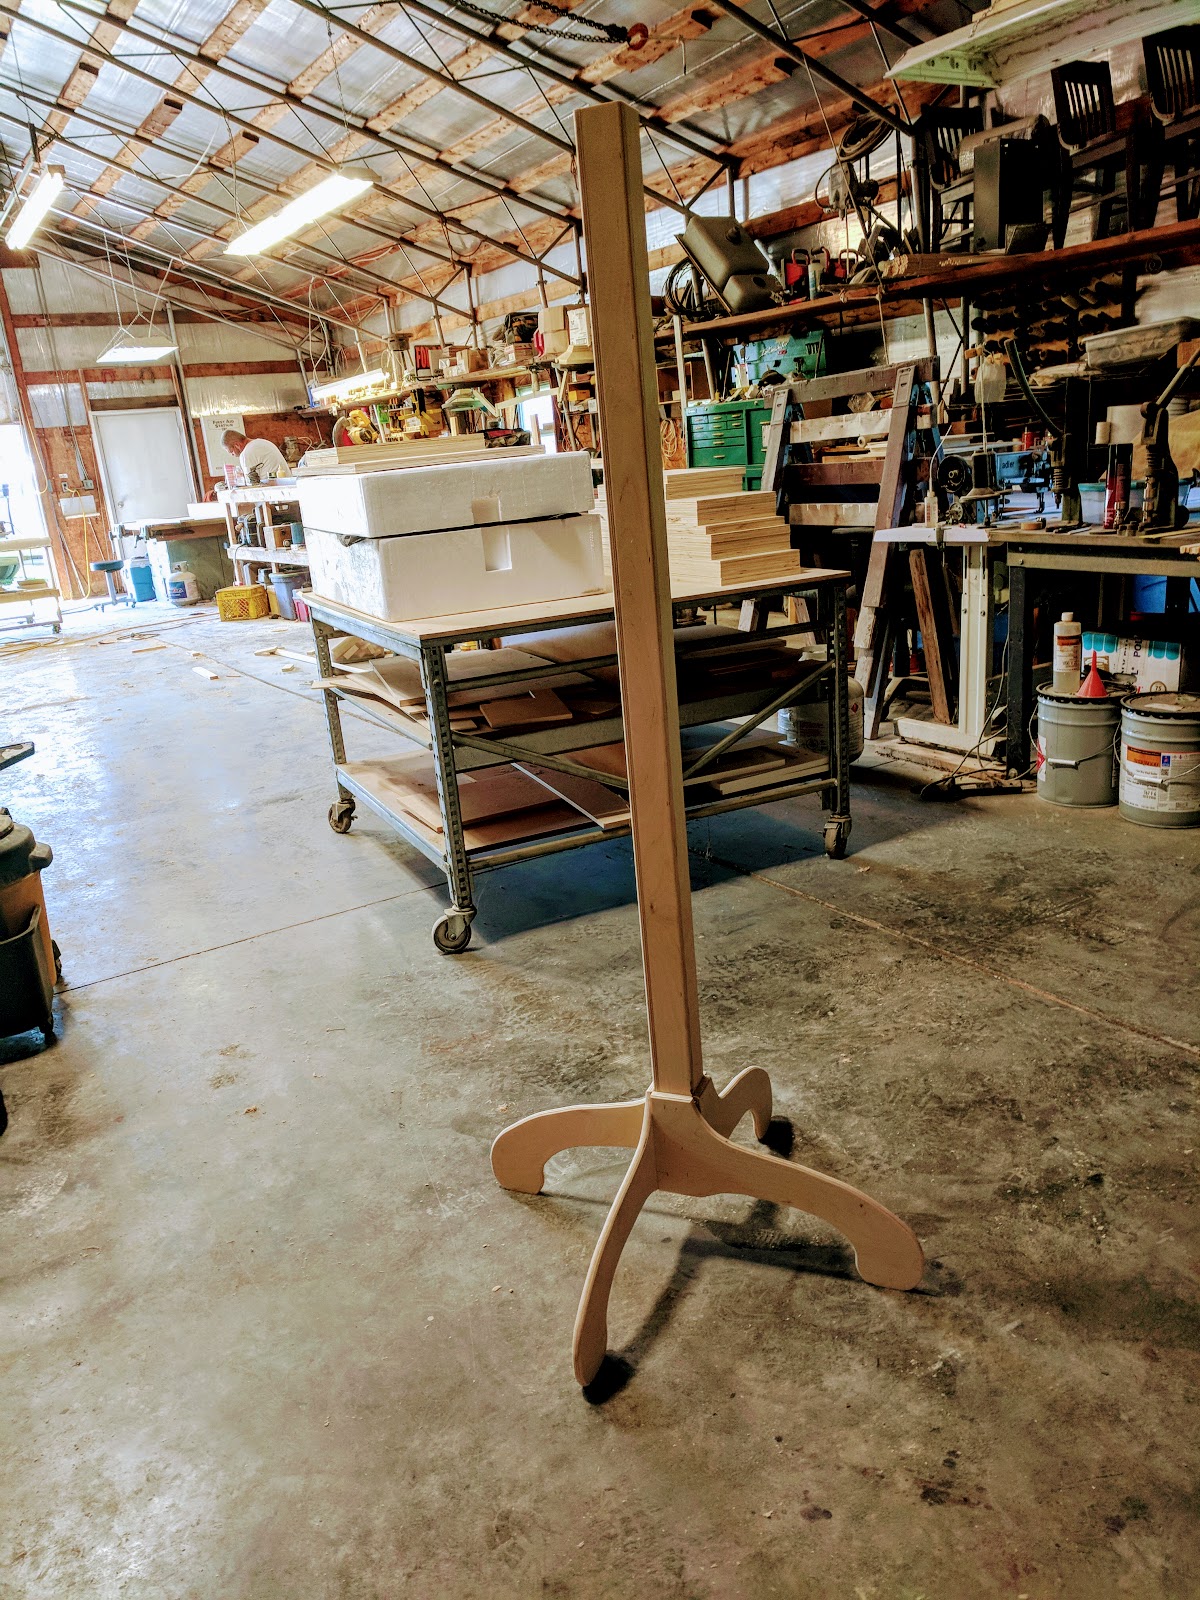
 The next thing you will want to do is attach your base legs to the post you built earlier, using the brad nailing gun. When you are finished, it will look like the photo.
At this point, you are almost finished with the plywood. I made the very top of my sign out of 1/2" plywood. The top rectangle piece was approximately 12"X 18" which you can cut out on the table saw. Once again, router the edges and make it splinter-free and pretty.
Now, you may want to stain your post and top signage pieces. I usually give stain 24 hours to completely dry, so that can be happening while you are working on other parts of this piece.
Before you stain the pieces, it is a good idea to run a hand sander over all of it. This cleans it up and gives the stain a better grip and area to sink into. It will also help clean up any wood glue that may have gotten on the outer pieces. Stain doesn't like to stick to wood glue.
 When you apply the stain, brush on the color that you have picked out and wipe it off in a few minutes. You don't want it to dry before you wipe it down because it can get tacky. I like to paint stain and wipe down one side at a time. I also try to paint the backside first, so when I handle it, I don't mess up the pretty side.
 When the stain is dry, you can paint whatever creative reading statement you would like on your sign topper. Mine had a pineapple (to go with the classroom theme) and the words, "Where will reading take you?"
Now, it is time to cut out the reading directional signs. We used 1/4" plywood to cut out the arrows, because it was thinner, had a smooth surface to adhere the decoupage to, and frankly there were scraps in the shop that needed to be used.
 I cut out strips into varying widths about 3" and 4" wide, on the table saw. I then cut the points of the arrows out with the miter saw to make sure they were even. If you make the directional arrows different lengths it will add a dimension to your piece, but you have to make sure your lettering will fit each piece.
After they were cut out, I stained the backside of the arrows. I didn't want raw wood standing out and making the piece look unfinished. I didn't stain the front because I had plans to cover them with scrapbook paper.
 (Yes, that is my hand wrapped because I had sprained it a few days before and hadn't received my brace yet. Sometimes, I think I am tougher than I am, but you are bound to get some bumps in bruises in life if you're up doing things. I don't intend to spend my life sitting in a chair~ unless I am writing a blog post, of course!)
The next step, was taking the arrows to the craft room and matching up scrapbook paper to them. I traced around the arrows, cut the paper to fit, decoupaged them on and let that dry.
When the glue was dry, I sanded the edges to make sure any excess paper was removed and painted the "directions" on them.
When the paint was dry, I added another coat of decoupage glue on top. This makes them look shiny and also helps when wiping off any finger prints that they may acquire throughout the year.
 The cool thing about this particular set of arrows is that I was able to download some different fonts that matched the titles of each sign. For example, the font "Willy Wonka" was perfect for the arrow that directed folks to the Chocolate Factory.

Another neat little note, about the paper I used, is I made it match a hall pass sign I had made for Miranda in the past.
Once everything had dried, it was time to put it all together.
So grab your direction arrows, your sign topper, and get ready to attach them to the post.
If you have a table to lay the post across, it helps when laying out your project pieces and attaching them arrows and sign topper.
Lay the topper and your arrows out along the post. When you have everything positioned where you want it to go, grab your screw gun and wood screws and put two down the center of your sign topper.
Next, put one screw into the center of each direction sign. Only putting one screw in, will allow the directional arrows to be slightly moved up or down and bring a little more interest to your piece. Remember, if you want your arrows to move, make sure your screws don't go in to far. Leave them some wiggle room!
Now that your piece is all put together, stand it up and step back and admire your great job. It's beautiful, functional and you did it all yourself.
I hope you enjoy making this reading nook sign as much as I did. And I hope you enjoy your journey to happy, healthy, and whole.

It occurred to me, that some of you might be able to use this in classrooms of your own or maybe switch it up a little and create a reading nook for your kids at home. To create this little gem, I had to go out to the wood working shop and enlisted a little help from my husband. Here is how we put it together.
Gather your supplies.
1/2" Plywood. (I used birch).
1/4" plywood
Wood screws
Wood stain
Staining brush
Rags to wipe stain off
Paint
Scrapbook paper
Sand paper
Decoupage glue. I used Modge Podge
Wood glue
You will also need access to a few tools.
Table saw
Ban saw
Miter saw

Screw gun
Hand Router
Brad nailing gun
Base and Post
The first thing that you will want to put together is your base and post. Run your plywood through the table saw to cut strips about 4 inches wide and about 5 feet tall.
Run a thin line of glue down the length of the 1/2" edge of one strip. Attach that strip with a brad nailing gun along the edge of the wide side. You will be creating a corner or 90 degree angle with the wood. Continue this process until all the sides are attached. This will look like a long wooden tube when you have it all together.
Run your hand router along the edges of your wooden tube. You're going to be handling this piece pretty often and you don't want splinters slowing you down.
Then, in an open area of the left over plywood, draw out the shape of one of your base legs. You will need four of them as the base attaches to the pole to stand up. I made these base legs about 18 inches long, because I wanted to make sure it would hold the weight of the completed sign and not fall over on any kiddos. When you have one drawn out, cut it out along the pencil lines with the ban saw. Trace around your newly cut out base section three more times to make them match and cut them out with the ban saw as well.
 The next thing you will want to do is attach your base legs to the post you built earlier, using the brad nailing gun. When you are finished, it will look like the photo.
 At this point, you are almost finished with the plywood. I made the very top of my sign out of 1/2" plywood. The top rectangle piece was approximately 12"X 18" which you can cut out on the table saw. Once again, router the edges and make it splinter-free and pretty.
Now, you may want to stain your post and top signage pieces. I usually give stain 24 hours to completely dry, so that can be happening while you are working on other parts of this piece.
Before you stain the pieces, it is a good idea to run a hand sander over all of it. This cleans it up and gives the stain a better grip and area to sink into. It will also help clean up any wood glue that may have gotten on the outer pieces. Stain doesn't like to stick to wood glue.
 When the stain is dry, you can paint whatever creative reading statement you would like on your sign topper. Mine had a pineapple (to go with the classroom theme) and the words, "Where will reading take you?"
Now, it is time to cut out the reading directional signs. We used 1/4" plywood to cut out the arrows, because it was thinner, had a smooth surface to adhere the decoupage to, and frankly there were scraps in the shop that needed to be used.

After they were cut out, I stained the backside of the arrows. I didn't want raw wood standing out and making the piece look unfinished. I didn't stain the front because I had plans to cover them with scrapbook paper.
 (Yes, that is my hand wrapped because I had sprained it a few days before and hadn't received my brace yet. Sometimes, I think I am tougher than I am, but you are bound to get some bumps in bruises in life if you're up doing things. I don't intend to spend my life sitting in a chair~ unless I am writing a blog post, of course!)
The next step, was taking the arrows to the craft room and matching up scrapbook paper to them. I traced around the arrows, cut the paper to fit, decoupaged them on and let that dry.
When the glue was dry, I sanded the edges to make sure any excess paper was removed and painted the "directions" on them.
When the paint was dry, I added another coat of decoupage glue on top. This makes them look shiny and also helps when wiping off any finger prints that they may acquire throughout the year.


Another neat little note, about the paper I used, is I made it match a hall pass sign I had made for Miranda in the past.
Once everything had dried, it was time to put it all together.
So grab your direction arrows, your sign topper, and get ready to attach them to the post.
If you have a table to lay the post across, it helps when laying out your project pieces and attaching them arrows and sign topper.
Lay the topper and your arrows out along the post. When you have everything positioned where you want it to go, grab your screw gun and wood screws and put two down the center of your sign topper.
Next, put one screw into the center of each direction sign. Only putting one screw in, will allow the directional arrows to be slightly moved up or down and bring a little more interest to your piece. Remember, if you want your arrows to move, make sure your screws don't go in to far. Leave them some wiggle room!
Now that your piece is all put together, stand it up and step back and admire your great job. It's beautiful, functional and you did it all yourself.
I hope you enjoy making this reading nook sign as much as I did. And I hope you enjoy your journey to happy, healthy, and whole.
~tracelaine


Comments
Post a Comment